
Beach Look by Jade Bailey
Hi guys, my name is Jade Bailey and below is a step by step guide to creating that bronzed beach look everyone loves!
You may notice that I haven’t used expensive big branded makeup because I want everyone to be able to create the look without breaking the bank!
Before starting your creation, please ensure your skin has been freshly washed, thoroughly dried and moisturised!
BEACH MAKE UP
Step 1 – Apply a generous layer of your everyday foundation, preferably using either a sponge or Foundation brush. Please ensure the colour matches the skin as we don’t want anyone orange or pale white! I find either Clarins or Maybelline Dream Satin liquid are fab as they create a smooth defined look.
Step 2 – Creating the base - Start with a general pressed powder. Apply it gently over the face to ensure even coverage and blend down the neck (Bethany wears MUA SHADE 4). Then move onto your bronzer. I used MUA (Makeup Academy) in SHADE 2. Start at the cheek and then slowly brush all the way up just above the eye brow (this will make your cheekbones seem longer and more defined). Repeat a few times in the motion of a ‘half moon’ around the eye, then a faint brush along the jaw line.
Step 3 – Lightly apply your blusher on top of the bronzer, just to give it a glowing effect (do not over apply as you’ll lose your bronzed look). Again I used MUA Blush SHADE 5 but this completely depends on your personal skin tone. To get the ‘glistening cheek’, I use BLUSH ME! in PINK – it may look very bright in the box but is just what you need! Apply it lightly to the cheeks and again in that half moon shape above the eye brow.
Step 4 – Moving onto eyes and starting with the brow! Using an eyebrow pencil (I used the MUA Blonde for Bethany) which is 3 SHADES LIGHTER than your actual brow. Evenly stroke it in the same line as your natural just filling in any gaps, don’t go over the top! This is just for gentle definition.
Then move on to apply your general Mascara. I recommend MAYBELLINE COLOSSAL VOLUME in BLACK to ensure the lashes stand out. I also suggest using an eyelash curler to rid of any excess and give an extended look.
I chose not to use Eyeliner on Bethany; however you are obviously welcome to. I would suggest just adding it into the outside corners of the water line for a relaxed smokey effect.
Step 5 – Using a WHITE eye shadow and brush; MUA was used again here, close one eye and cover half of the lid in white working from the inside out. Ensure to pay more attention to the duck tear area. Then just take the brush around the duck tear to the bottom of the eye lid and cover ¼ of the lash line also in white (this will widen the look of your eyes).
Move onto a light BROWN/GOLD shadow with a clean brush (I would suggest L.A Girl Code 4127). Cover the remaining half of the lid and just over the lining of the white to ensure a blend. Then with a DARK BROWN, work from the outside of the lid inwards, just creating that subtle smoke until it’s the preferred darkness. I would also suggest lining the top and bottom lash lines with a dark brown for maximum effect.
Go onto use a GOLD SHIMMER and gently dust under the brow line to make the eyes ‘glisten’ with the bronzer. Bethany also wears NATURAL false lashes which can simply be purchased from PRIMARK and are the best I’ve ever used!
Step 6 – Lips! I used a subtle tone of pink marshmallow gloss to give a plump finished look!
Step 7 – If like Bethany you’re shooting in swimwear then please ensure that you are clean shaved, moisturised and add a light brushing of shimmer down the front of the legs and on your torso to create that perfect glow!
This may seem like you’re wearing a lot just for a ‘beach look’ but LESS IS ALWAYS MORE! Have fun creating your beach looks!
BEACH HAIR
Beach hair is much simpler to the makeup! All you need are either SLEEP IN or VELCRO ROLLERS, Hairspray, Serum and a comb!
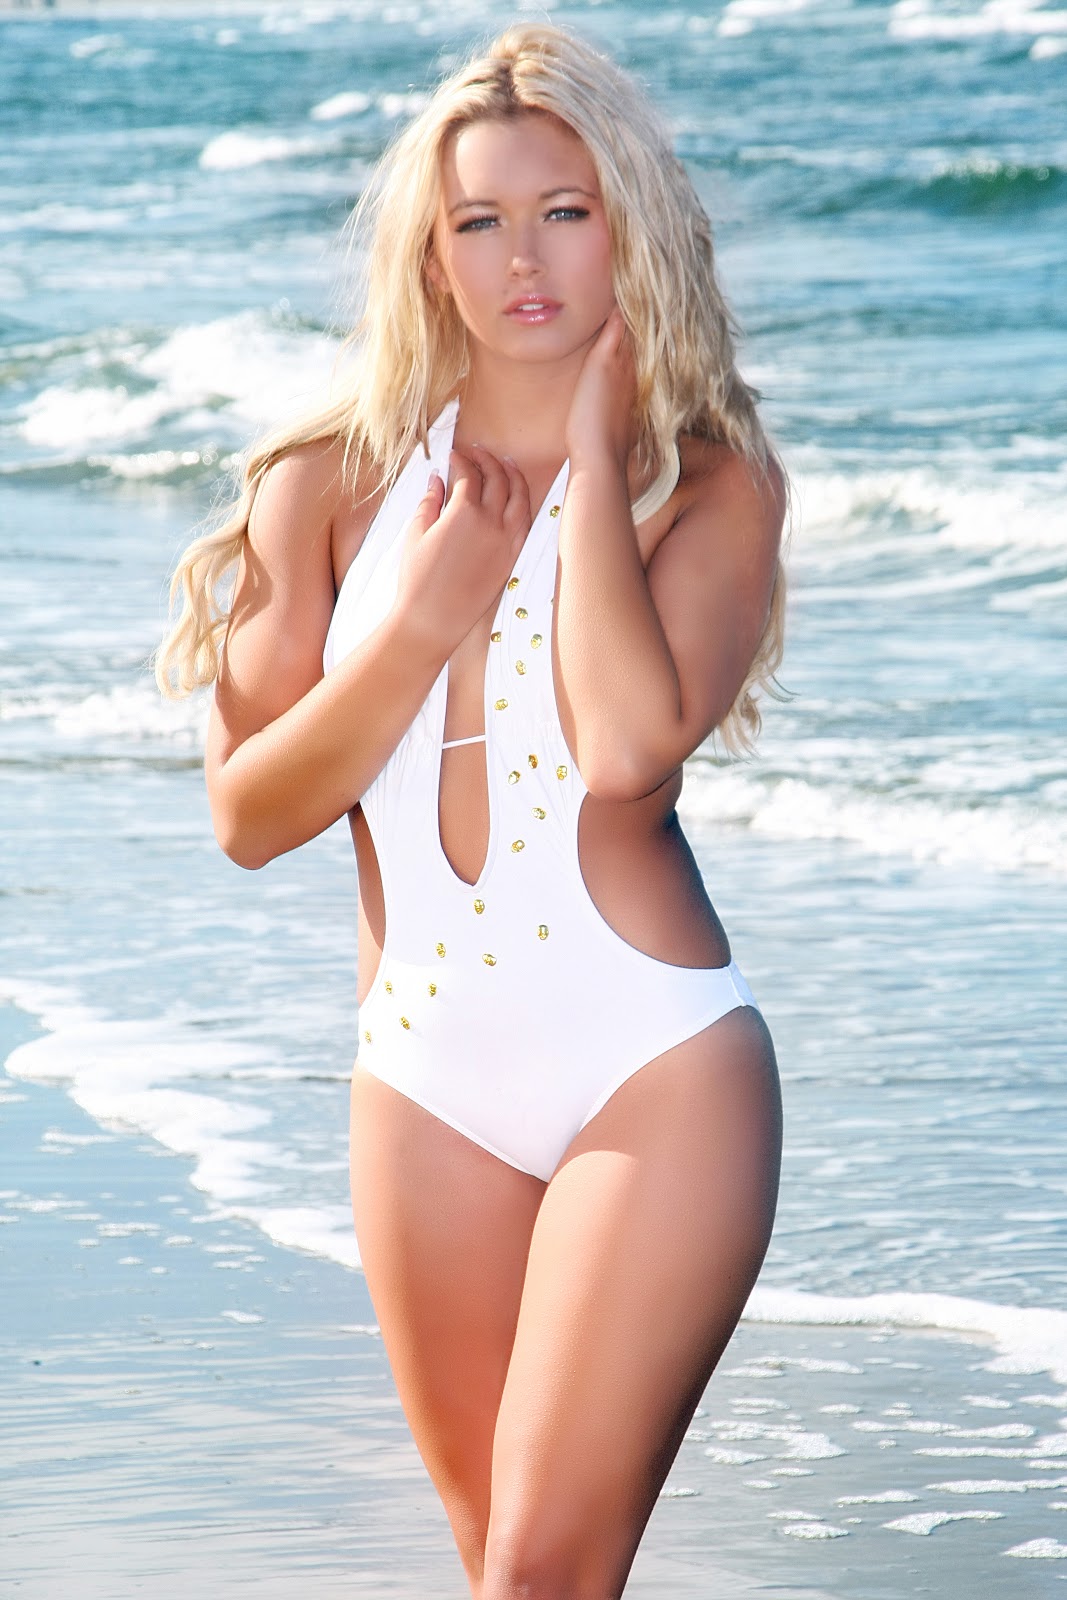 |
| White and Gold Stud Monokini by Naomi Amba - Secret Beach Collection. |
Step 2 – Once the rollers have had their time to set, unroll the hair slowly. You should now have a lot of volume, but don’t worry - it can be controlled! Using a comb, just gently back comb under the top layer of hair and then smooth over. Pull the curls loose using your fingers, tugging slightly to ensure a ‘wavy’ effect. Once the top roots have been smoothed, start applying the hairspray. Make sure you pay more attention to the ends rather than top as you don’t want it to look stiff.
Step 3 – Pull your fingers through the curls again and set into the style you prefer. If you have any ‘wispy’ bit then use a pea size amount of Serum. A great one is the DREAM HAIR, FLAWLESS BALM as it doesn’t look greasy or over the top.
That’s it! If you wish to add a few more curls then go ahead! Just use a Curling Iron or curved Straightners on the ends to give the definition preferred.
Swimwear Designer: Naomi Amba
Model: Bethany Cammack
Photograher: Paul Carroll
MUA: Jade Bailey
These images are owned by the originators and must not be copied or manipulated without permission. The image is subject to copywrite and a charge will be levied if it is found the images are copied.